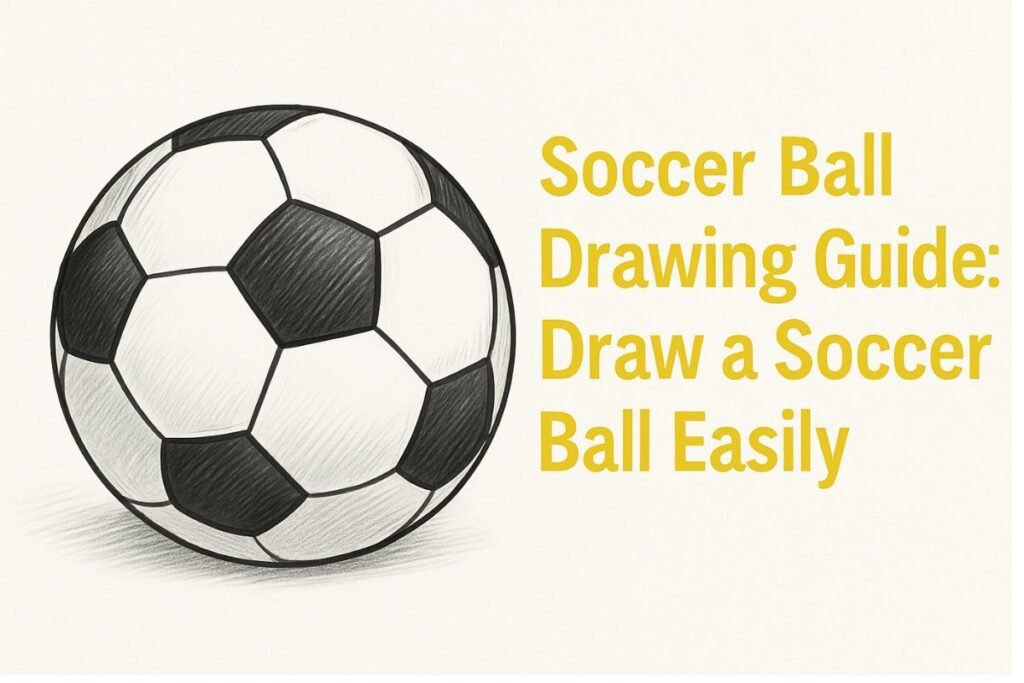
Soccer Ball Drawing Tutorial: Easy Step-by-Step Guide
If you’ve been asking “how to draw a soccer ball”, this tutorial has you covered! Soccer ball drawing is a fun and rewarding art project for sports fans and aspiring artists alike. As the world’s most popular sport, soccer (also known as football outside North America) has over 3.5 billion fans. This global popularity means that drawing a soccer ball is an engaging activity that many people around the world can relate to. In this tutorial, we’ll guide you through each step of creating your own soccer ball drawing, from sketching the basic outline to adding the classic black-and-white panel pattern. Whether you’re looking for an easy soccer ball drawing or a detailed design, these instructions will help you draw a soccer ball with confidence.
For many kids and beginners, drawing a soccer ball is a great way to practice combining simple shapes into a more complex design. This exercise helps build fine motor skills and an understanding of symmetry. Once you’ve mastered this pattern, you can apply similar techniques to draw other round objects, like a basketball or even a globe. So think of this soccer ball tutorial as the first step in a larger artistic journey. The skills you gain here will serve you well in many drawing projects. The more soccer ball drawings you create, the stronger your foundation in shapes and shading will become.
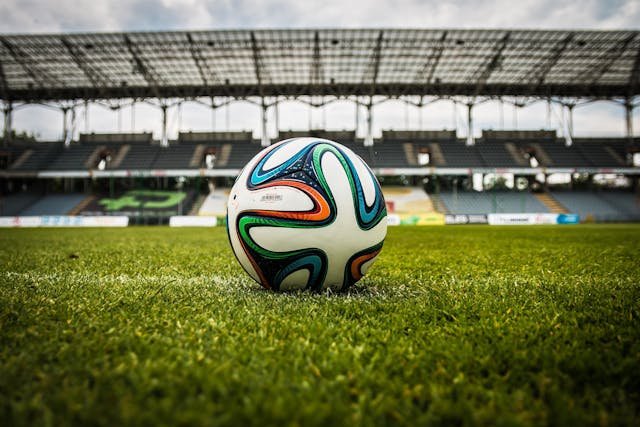
This photograph of a classic black-and-white soccer ball on a grassy field can serve as inspiration for your drawing. The soccer ball features the familiar geometric pattern of pentagons and hexagons – typically 12 black pentagons and 20 white hexagons. These panels form a truncated icosahedron shape, which gives the ball its nearly spherical form. We’ll start by drawing a large circle for the ball’s outline and then add the signature pentagon-and-hexagon pattern step by step. With the right approach, even your first soccer ball drawing can turn out great!
Supplies and Tools Needed
Before you begin your soccer ball drawing, gather the following materials:
- Paper: A sheet of drawing paper, sketchbook, or any blank paper. Thicker paper can handle erasing without tearing. Smooth white paper is ideal for pencil shading.
- Pencil: A graphite pencil (HB or 2B) to make light sketch lines. Softer pencils (4B) can add darker shading later. For precision, a mechanical pencil with fine lead is helpful.
- Eraser: A clean eraser for correcting mistakes. Kneaded erasers are great for gently lifting graphite, and white vinyl erasers erase cleanly.
- Circle template or compass: To draw a perfect circle for the ball outline. You can use a drawing compass, or trace around a round object like a cup, lid, or even a roll of tape.
- Ruler: For drawing straight guide lines and ensuring symmetry in the panel pattern. A 6-inch ruler is handy.
- Black marker or pen: A black marker, pen, or fineliner to outline the final soccer ball pattern clearly. This makes the panels stand out.
- Coloring tools: Colored pencils, crayons, or markers for adding color to the panels. Black and white (or grayscale pencils) are traditional, but feel free to use team or fun colors.
- Digital tools (optional): If working on a tablet or computer, apps like Procreate, Photoshop, or Illustrator can be used. These programs have shape and symmetry tools to help draw the ball precisely.
- Additional aids: A light table or window (for tracing) can also help beginners get the initial circle shape just right. A clean sheet under your drawing hand can prevent smudging.
Experiment with what you have. For digital artists, try using layers to separate the circle, panel sketch, and shading. If you draw on paper, keep pencils sharp and consider using colored pencils or crayons for a fun texture. Even using unconventional tools (like chalk on a sidewalk) can be a creative way to practice. In short, any tool that lets you draw a circle and straight lines will do—adapt these recommendations to your situation. Having these supplies ready will make it easier to focus on drawing the soccer ball.
Understanding the Soccer Ball Design
A soccer ball’s design is more than just random patches: it follows a specific geometric pattern. The traditional soccer ball (like the famous Adidas Telstar introduced in the 1970 World Cup) is based on a truncated icosahedron. In plain terms, this means:
- 32 panels total: The classic pattern has 20 white hexagons and 12 black pentagons. These panels are stitched together to approximate a sphere.
- Pentagons and hexagons: Each black pentagon touches five white hexagons, and each hexagon touches three pentagons. When drawn correctly, this creates the soccer ball’s characteristic look.
- Black-and-white pattern: The original coloring alternates black and white to create contrast on TV. The Adidas Telstar ball of 1970 popularized the black pentagon/white hexagon look. Today, soccer balls come in many colors, but the classic design remains iconic.
- Geodesic structure: The truncated icosahedron shape is not only in sports; it appears in science and engineering. For example, the carbon molecule “buckyball” (C₆₀) has exactly this pattern. This shows how the same geometric design appears in nature and architecture.
Understanding this structure is helpful for drawing: it tells you how the shapes fit together. Even if you don’t draw every panel, sketching at least one central pentagon with surrounding panels will make your soccer ball drawing look authentic. By the way, did you know that the famous “buckyball” molecule (C₆₀) is shaped like a soccer ball? It’s a spherical carbon structure called buckminsterfullerene. This fun fact shows how geometry and art overlap. Every soccer ball drawing you do reflects a bit of math and science!
How to Draw a Soccer Ball: Step-by-Step
Follow these steps to draw an accurate soccer ball. Take your time with each step and use light pencil lines that you can erase later.
- Draw the outer circle: Start by lightly sketching a large circle that will form the outline of the soccer ball. Use a compass or trace around a circular object (like a cup or lid) for a perfect circle. If drawing freehand, keep your wrist relaxed and try to draw a continuous curve. You can even anchor a piece of string at the paper’s center and swing a pencil around it to ensure a true round shape. This circle defines the overall size of your ball, so make it as neat as possible.
- Sketch the central pentagon: Find the center of your circle and lightly draw a small pentagon (five-sided shape). One way is to draw a horizontal line across the circle to mark the center point, then draw five connected sides of equal length around that point. You can estimate the angles (about 108° each) or use a protractor. This pentagon will represent one of the ball’s panels. Keep these lines very light, as they are guides you can adjust later.
- Add connecting lines for hexagons: From each corner of the pentagon, draw a straight line outward toward the circle’s edge, ending about halfway to the edge. You should have five short lines radiating out. Next, connect the ends of these lines to form hexagon shapes. Specifically, draw three lines connecting each pair of pentagon corners—these lines become the edges of adjacent hexagons. Think of it as creating a honeycomb pattern; each pentagon vertex leads into the next panel.
- Complete the panel pattern: Continue adding panels by drawing more lines around the circle. After forming the first ring of hexagons, draw additional short lines from the outer corners of those hexagons, and connect them in the same way. This will create more panels, including incomplete shapes along the boundary of the circle. It’s not necessary to draw all 32 panels—the key is to create a clear, symmetrical pattern that looks like a soccer ball.
- Outline and erase: Once your panel sketch is complete, outline each pentagon and hexagon with a darker pencil or pen. Carefully trace over the final edges so the pattern stands out. Then erase any construction lines and the initial circle outline, leaving a clean soccer ball outline with just the panel borders visible. The ball’s outline should be a smooth circle with crisp panel lines.
- Color and shade (optional): If desired, fill in the panels with color. Traditionally, pentagons are black and hexagons white. Use shading to add dimension: choose a light source direction and shade the panels on the opposite side. Darken the edges of the ball on the shaded side, and add a cast shadow beneath the ball. These finishing details will make your soccer ball drawing appear three-dimensional and polished.
Here is a quick summary of the key steps:
- Draw a large, neat circle.
- Sketch a small pentagon at the center.
- Draw lines from each pentagon corner to form surrounding hexagons.
- Extend and connect lines to fill the circle with panels.
- Outline the panels and erase extra lines.
- Fill in colors and add shading for realism.
Following these steps will help you create an accurate soccer ball drawing. Practice each step slowly, and refer to a reference image if you get stuck. Don’t forget: every soccer ball drawing you do is practice that improves your skills.
Tips for an Easy Soccer Ball Drawing
Drawing a soccer ball can be tricky because of its symmetrical panel pattern. Use these tips to simplify the process:
- Start lightly: Keep your pencil lines very light at first. This allows easy erasing. Once you’re happy with the shapes, go over the final lines darker.
- Use a guideline: You can lightly draw crosshairs or a star shape inside the circle to mark the center. This helps position the pentagon and keep everything even.
- Circle aids: Don’t hesitate to use a circular object (cup, lid, compass) to get a perfect outline. A symmetrical circle makes the rest of the drawing easier.
- Proportion is key: Keep the pentagon fairly small (about one-quarter to one-third the diameter of the ball). The surrounding panels will be larger. If the shapes aren’t the right size, the ball will look oddly shaped.
- Check symmetry: As you draw panels, check that opposing panels match up. You can lightly measure with a ruler if needed to make sure lines are evenly spaced.
- Panel perspective: Remember the ball is round, so panels near the edges appear squished (more curved). You don’t have to draw all 32 panels; often 3 or 4 visible pentagons on the front is enough for a believable effect.
- Practice shapes: If you struggle with pentagons, practice drawing regular pentagons on scrap paper first. It gets easier with repetition.
- Color tools: When coloring, use colored pencils or markers. For a crisp look, color lightly at first and then darken. For digital drawings, use layers and shape tools for precision.
- Stay relaxed: Keep your hand loose when drawing long curves. A tense grip can make lines wobbly.
- Sketch frequently: An effective way to improve is quick sketching. Draw many soccer balls in a short time: spend 30 seconds on each. These rapid sketches don’t need to be perfect; they train your hand to visualize the ball’s shape and pattern quickly. Drawing with your non-dominant hand is also a fun challenge.
- Watch and trace: A helpful technique is to draw your soccer ball while watching a game: pause on a clear shot of the ball and try sketching what you see. This trains your eye to match the on-screen shape to paper. You can also view your drawing in a mirror occasionally; seeing it from a fresh angle often reveals uneven lines.
- Digitally: In Procreate or similar apps, use QuickShape: draw a circle and hold your pencil to have it auto-correct. Or draw one pentagon, copy and rotate it to get perfectly aligned panels.
- Kids and group learning: Drawing a soccer ball is a wonderful exercise for all ages. Make it a team activity – one person draws the circle, another adds the pentagon, others draw hexagons – turning soccer ball drawing into a fun group project.
These tips help keep your soccer ball drawing process smooth and enjoyable. Practice regularly and you’ll see improvement in every drawing you make.
Coloring and Shading the Soccer Ball
Once your outline and panels are complete, you can color and shade your soccer ball drawing. Traditional soccer balls are black and white, but you can get creative with colors. Here are some guidelines and ideas:
- Base colors: Use black (or dark gray) for the pentagon panels and white (or a light shade) for hexagons, just like a classic ball. If you want a colorful design, try one color for all pentagons and another for all hexagons (for example, a team’s colors).
- Consistent panels: Make sure all pentagons are filled with one color and hexagons with another. This contrast defines the pattern.
- Shading: Choose a light source (e.g. top-left). Shade the sides and bottom of the ball away from the light. You can darken one side of each panel that faces away from light. Also, add a soft shadow on the ground under the ball. This creates a 3D effect.
- Highlights: Leave a few areas or panels with no shading to represent highlights where light hits directly. This might be a small white spot on the top panels.
- Texture: For realism, lightly hatch (draw fine lines) within the panels or use a blending stump to smooth shading. Soccer balls have a subtle grainy texture on leather panels; adding speckles or light cross-hatching can simulate that.
- Coloring tools: If using watercolors or markers, color within the lines carefully. Dark markers can bleed, so fill black panels gradually. For pencil, layering a little at a time avoids waxy buildup.
- Digital art: Use layers. On one layer, fill the pentagons with black and hexagons with white. On another layer (set to Multiply or Shadows mode), add gray shadows. On a top layer (Overlay or Light mode), paint bright spots for highlights. Digital brushes can blend edges smoothly.
- Creative effects: For an artistic twist, try a retro soccer ball: use brown and tan to mimic an old leather ball. Or give the ball neon colors for a futuristic look. You could even draw a glowing aura by adding soft colored halos around it in digital art.
- Background: To ground the ball in context, you could draw it on grass or turf. Lightly sketch in grass blades around the base and color them green. Shade the area where the ball meets the ground for a realistic touch.
Remember, the goal is to make the ball look round and three-dimensional. Even simple shading and clean coloring will greatly enhance your soccer ball drawing.
Common Mistakes to Avoid
When drawing a soccer ball, beginners often make similar mistakes. Watch out for these:
- Warped circle: If your initial circle outline is uneven or lopsided, the whole ball will look off. Use a template or go slowly to keep it round.
- Off-center pentagon: If the central pentagon is not placed in the middle, the pattern cascades unevenly. Make sure your pentagon is roughly at the center of the circle.
- Uneven panels: Drawing pentagons or hexagons of different sizes can skew the design. Check lengths with a ruler if needed, so panels are consistent.
- Asymmetry: The ball should look symmetric. If one side has many panels drawn and the other side few, the ball appears incomplete. Distribute panels evenly.
- Visible guidelines: Leaving construction or overlapping lines (like the faint circle or guides) can make the drawing look messy. Erase all extra lines clearly when finalizing the outline.
- Flat coloring: Coloring panels flatly with no shading makes the ball look two-dimensional. Don’t skip shading and highlights.
- Heavy-handed coloring: Pressing too hard when coloring black panels can make ink or paint bleed. Build up color gradually for a smooth finish.
- Too many panels: Beginners sometimes try to draw every hidden panel. Only draw what’s visible; hidden backside panels aren’t necessary. Fewer panels will often suffice to sell the idea of the ball.
- Rigid lines: If your panel edges are perfectly straight, the ball might look unnatural. Real soccer balls have slightly curved seams—feel free to subtly curve panel edges to match the ball’s contour.
- Wrong perspective: If you attempt to tilt the ball (draw in perspective) but still use a perfect circle outline, the geometry will be off. For advanced perspective, the outline should be an ellipse, but that’s beyond basic.
- Neglecting the environment: If you want a realistic scene, remember where the ball is. Adding a ground or context (like grass or a soccer field) can improve the drawing, but make sure the ball’s shadow matches.
Avoiding these pitfalls will help ensure your soccer ball drawing looks polished and realistic. If you do make a mistake, remember you can always erase and redraw that part. Practice and patience are key.
Soccer Ball Drawing FAQs
Q: How can I draw a soccer ball easily with step-by-step instructions?
A: Follow the steps outlined above. Start with a circle, then sketch a central pentagon, and connect lines to form surrounding hexagons. Use light pencil lines and a reference image if needed. By taking it one step at a time, even complex soccer ball drawings become manageable.
Q: What materials and tools are best for drawing a soccer ball?
A: A simple set includes paper, a pencil, and an eraser. A compass or circular object helps draw a perfect circle. Use a ruler for straight panel edges and a black pen or marker to finalize the panels. For color, have black and another colored pencil ready. Digitally, use shape tools and layers. Having these makes soccer ball drawing easier.
Q: Can I draw a realistic-looking soccer ball even if I’m a beginner?
A: Yes! Focus on getting the circle and panel pattern right first. Then add shadows and highlights to give the ball a 3D appearance. Even beginners can achieve realism by slowly building the drawing. Practice by drawing multiple balls from reference photos; your skill will improve quickly.
Q: Why does a soccer ball use pentagons and hexagons in its design?
A: The pattern comes from a geometric shape called a truncated icosahedron. This shape naturally forms a nearly spherical surface with 12 pentagons and 20 hexagons. The Adidas Telstar ball popularized this black-and-white design in 1970, but the choice is rooted in geometry. In a drawing, understanding this helps you accurately place each panel.
Q: Is there an easy soccer ball drawing method for kids?
A: Absolutely. Use simpler shapes and fewer details. For a soccer ball easy drawing, kids can start with a circle and draw just one large pentagon (black spot) in the middle. Even coloring a couple of additional panels is enough for a recognizable ball. Use bold, thick strokes and let them color all pentagons one color and hexagons another for a clear pattern. Making it a fun craft (like gluing shapes on paper) can also help very young children.
Q: How do I draw a soccer ball in perspective (viewed from an angle)?
A: To draw a tilted soccer ball, start with an ellipse instead of a circle to show perspective. Place the pentagon on the visible front surface of that ellipse. Panels on the sides will appear squished. You might lightly draw guidelines to ensure panels align properly. Start with a slight tilt and practice until you feel comfortable.
Q: Can I draw a soccer ball with different colors or patterns?
A: Absolutely. Modern soccer balls often have colorful designs. Follow the same drawing steps but use colored pencils or markers to fill panels with any colors. For example, use green and yellow for a Brazil-themed ball. The panel pattern stays the same; only your color scheme changes.
Q: What’s the easiest way to practice soccer ball drawings?
A: Practice by repetition and variation. Try tracing a soccer ball from a photo, then freehand it. Sketch balls of different sizes on paper. Use a timer for quick sketches to build speed. Also try drawing with your non-dominant hand or blind-contour drawing (drawing without looking at paper) to strengthen your overall skill. Over time, each practice drawing becomes easier and more accurate.
Q: How can I draw a soccer ball without using any tools?
A: Practice freehand techniques daily. To draw a near-perfect circle freehand, try pivoting from the elbow, not the wrist, or use the “rotating the paper” trick (turn your paper as you draw). You can mark four points (top, bottom, left, right) on the circle lightly to guide your hand. Freehand is harder at first, so use the compass method until you’re comfortable.
Q: How can I use templates or guides to help?
A: Pre-made templates and coloring pages can jumpstart learning. For instance, printing a blank soccer ball outline lets beginners just color it in. Tracing is a good exercise: place tracing paper or carbon paper over a soccer ball image and copy the lines. These methods teach you shapes until you’re ready to draw freehand.
Q: Why is soccer ball drawing a good exercise?
A: It combines art with math (symmetry, geometry) and creativity. It’s also widely relatable for soccer fans, making it fun. Drawing soccer balls improves your fine motor skills, spatial understanding, and comfort with shading. It’s an excellent stepping stone to drawing other sports gear or round objects.
Soccer Ball Drawing for Kids
Younger artists can tackle soccer ball drawings by simplifying the process. For example, to make it a soccer ball easy drawing, have kids start with a circle and draw just one large pentagon in the middle, filling in just a couple of adjacent panels. Even that minimal design clearly looks like a soccer ball. Encourage them to color all pentagons one color and hexagons another color or pattern, reinforcing the classic look without requiring perfect geometry. Using crayons or markers, they can fill in sections boldly.
Drawing a soccer ball is also a team activity – try it with a friend or classmate. You take turns adding shapes and lines until the ball is complete, turning the soccer ball drawing into a fun group project. For example, one child can draw the central pentagon while another adds surrounding hexagons—this collaborative approach makes the task enjoyable. It also builds confidence: celebrating each small success (like coloring a spot) motivates kids to keep drawing.
This easy soccer ball drawing approach ensures even beginners can create a recognizable ball. Celebrate their efforts—have them personalize their ball by adding favorite team colors or a smiley face on one panel. The goal is to make soccer ball drawing enjoyable and confidence-building for young artists.
Advanced Soccer Ball Drawing Techniques
Once you’ve mastered the basics, try some advanced soccer ball drawing techniques:
- Three-dimensional perspective: Draw the ball as if it’s near or far. For an angled ball, use an ellipse for the outline. Panels on the far side become narrower. Practice using light guidelines for perspective.
- Realistic textures: For photorealism, add details. Soccer balls have subtle wrinkles and stitching. After outlining, use a blending stump or your finger to smooth pencil shading on panels for a leathery look. Add small speckles or lines on panel edges to simulate texture.
- Action scenes: Put the ball into motion. Add motion lines or a blurred background to show speed. You might draw it being kicked by a player or bouncing. Even adding a dust cloud can suggest impact. These details make a dynamic soccer ball drawing.
- Famous ball designs: Try replicating a World Cup ball. First draw the panel layout, then overlay special graphics. For example, the 2018 Telstar had digital stripes, and the 2014 Brazuca had colorful ribbons. You’d draw the shape the same, then fill panels with that pattern.
- Mixed media: Combine pen and watercolor or digital edits. For instance, ink the outlines and add watercolor washes. In digital art, use lighting effects or textures to enhance realism.
Experiment with different tools (charcoal, pastels) or styles (cartoon vs realistic). The soccer ball’s pattern gives endless room for creativity beyond a simple ball, so have fun pushing your art further!
Evolution of Soccer Ball Designs
Soccer balls have changed over the years, and these variations can inspire your drawings. The traditional 32-panel ball (12 pentagons, 20 hexagons) became standard in the late 20th century. Since then, manufacturers have experimented with panel shapes and colors. For example, the 2010 World Cup ball (“Jabulani”) used only 8 colorful curved panels, while earlier balls like the 1982 “Tango” had 20 panels with fancy motifs.
When drawing a specific design, first outline the round ball as usual, then add its unique graphics. Studying pictures of famous balls can help you replicate tournament styles. However, it’s perfectly fine to draw an imaginative or stylized soccer ball: the core drawing skills still apply. You might give your ball bold stripes, polka dots, or your favorite team’s logo on one panel. As long as the pentagon/hexagon framework is recognizable, your soccer ball drawing will clearly look like a soccer ball, even if the design is original.
Every soccer ball drawing you do can reflect a bit of soccer history. Have fun experimenting with color schemes and panel arrangements – this is where your creativity shines!
Examples & Inspiration
Soccer ball drawings can range from simple to highly artistic. Some artists depict the ball exactly as it looks in real life, while others add creative flair—giving the ball eyes and a smile for a mascot design, or adding motion lines to make it dynamic. A quick search online will show you many examples: from children’s coloring pages to professional sports posters. Notice how cartoon drawings often use fewer panels and brighter colors, while realistic drawings include detailed shading and even grassy backgrounds.
For more inspiration, look at other soccer ball drawings in coloring books or online galleries. You might notice trends, like using bright neon colors or adding highlights on panels. Try copying a small section of a favorite soccer ball drawing by hand to study its style. Each new drawing you see can teach you something about shape and shading. Use these inspirations to develop your own style: maybe combine a realistic ball with comic effects, or integrate it into a scene with players.
Looking at a variety of soccer ball drawings can spark ideas for your next sketch. Keep a sketchbook of soccer ball drawings (your own and others’) to track your progress and inspiration.
Digital Soccer Ball Drawing Tools
Drawing a soccer ball digitally allows for convenient techniques. In vector programs (Illustrator, Inkscape), you can draw one pentagon and use a rotate-copy function to place the other five perfectly around it. In raster apps (Procreate, Photoshop), use layers: one layer for the circle outline, one for the panel sketches, and another for shading. Many apps also have symmetry or polygon tools.
One tip: after drawing the panel outlines on a layer, use a magic wand or lasso to select all pentagons at once and fill them with black or another color in one click. You can then nudge or transform them easily. If you want a perfect circle, use the ellipse tool with a fixed ratio. The undo/redo features mean you can freely experiment with panel placement.
The digital approach can speed up your workflow, but the artistic principles remain the same. Practice drawing soccer balls by hand and on digital devices to be versatile.
Sketching Practice
An effective way to improve is quick sketching. Draw many soccer balls on scrap paper. For example, set a timer for 30 seconds and draw one ball, then increase to 1 minute for the next one. Focus on capturing the circle and a simple pentagon/hexagon pattern in the time allowed. These rapid sketches train your hand to visualize shapes quickly. Over time, you’ll notice your lines getting smoother and your shapes more accurate. Try using your non-dominant hand occasionally as a challenge—this builds confidence in freehand drawing.
Using Templates and Guides
Teachers and parents sometimes use pre-made guides to teach drawing. For example, you can print a blank soccer ball outline and have students color or trace it. Tracing tutorials are also useful: place a transparent sheet over an image of a soccer ball and trace each panel. These exercises help beginners see the proportions without worrying about perfect accuracy. Over time, challenge yourself to move away from templates. Attempt a soccer ball drawing from memory or imagination. This strengthens your ability to visualize the panel layout without help.
Ultimately, the goal is to learn and improve, so gradually move from guided practice to fully drawing the ball by eye.
Share and Improve
Once you finish a soccer ball drawing, share it to get feedback and encouragement. Post your artwork online or hang it where others can see. Art communities love sports themes; tagging your work with keywords like soccer ball drawing can help fellow artists find it. You’ll likely get comments and suggestions, which help you refine your technique. Also, look at other soccer ball drawings by peers: you might pick up new ideas about panel style or coloring.
Discussing your drawings is motivating. For example, one person’s soccer ball might have neon stripes while another’s looks realistic. Chatting about these differences can inspire your next drawing. Every comment and different perspective is a chance to learn. Remember, even professional illustrators improve by exchanging feedback, so getting input can help you make your soccer ball drawings even better.
Soccer Ball Drawing in Education
Soccer ball drawings appear often in art and math classes. Drawing a soccer ball combines artistic skill with geometry. For example, teachers might ask students to practice measuring angles and lengths by sketching a soccer ball – this way, math and art come together. By labeling each panel, students learn about pentagons and hexagons in a fun context. Younger children enjoy the coloring aspect, while older students can calculate the angles or even estimate the ball’s area from the drawing. Including a soccer ball drawing in a project reinforces multiple subjects at once.
One educational twist: have students calculate how many panels of each type are on various balls. Discuss famous balls (like Telstar, Jabulani) and count their panels. You could even examine a physical soccer ball together and map it onto paper. After the activity, sharing those soccer ball drawings in class can be motivating for all students. Each drawing then becomes a unique representation of a math-art exercise.
Conclusion
Keep doing more soccer ball drawing exercises whenever you can. Now it’s your turn: share your soccer ball drawings with friends or on social media and see how others can build on your ideas. Leave comments or questions below – engaging with fellow artists and fans is a great way to learn new tips. If you enjoyed this guide, check out other sports drawing tutorials on our site. Each soccer ball you draw will improve your skill, so keep practicing. We hope this soccer ball drawing tutorial has inspired you – happy drawing and keep the game alive in your art!
Keep practicing and improving your soccer ball drawing skills, and enjoy every moment of your soccer ball drawing adventure!