Properly inflating your Soccer Ball Size 5 – the standard adult soccer ball – is crucial for best performance, control, and safety. A correctly inflated ball has the right firmness and bounce, ensuring predictable play on the field. This guide covers everything from choosing the right PSI pressure to step-by-step inflation instructions, plus creative methods when you lack a pump or needle. We’ll also cover how to tell when inflation is correct and answer common FAQs. Throughout, we use evidence-based tips (with expert citations) to ensure you inflate your size 5 ball like a pro.

Why Proper Inflation Matters for Soccer Ball Size 5
A Soccer Ball Size 5 must be inflated to just the right pressure for optimal play. Under-inflation makes the ball too soft and slow (poor bounce and control), while over-inflation makes it overly hard and unpredictable (risking poor control and injury). FIFA regulations for official matches specify a pressure between 0.8 and 1.1 bar (8.5–11.6 PSI), balancing a firm bounce with player safety. Club and training balls often use a slightly lower end of that range. In practice, most size 5 balls perform best around 10–12 PSI (0.7–0.8 bar).
Recommended pressure can vary by ball type: for example, training balls may use 0.6–0.9 bar (8.7–13.1 PSI), whereas professional match balls often use 0.7–1.0 bar (10.2–14.5 PSI). Always check the ball’s valve area or packaging for its manufacturer’s rating. If in doubt, use a pressure gauge. A quick rule of thumb is to press the inflated ball with your thumbs: if it gives about ½ inch under firm pressure on each side, it’s likely in the right range. Below that and the ball is hard (overinflated); above and it’s too soft (underinflated).
Key Points on Pressure:
- Adult Size 5 (standard): ~0.6–0.9 bar (8.7–13.1 PSI).
- Professional Matches: ~0.7–1.0 bar (10.2–14.5 PSI).
- FIFA Rule: 0.8–1.1 bar (8.5–11.6 PSI) for international games.
- Thumb Test: Ball should indent about ½” under thumb pressure.
- Bounce Test: A properly inflated ball will bounce back to a reasonable height when dropped.
Maintaining this pressure is important. Over a few days, even a good pump will slowly lose air. Check and top off air before each game or practice. Also be aware temperature changes: cold air makes the ball softer, and heat makes it firmer. Always adjust pressure if the ball has been in a very hot/cold place.
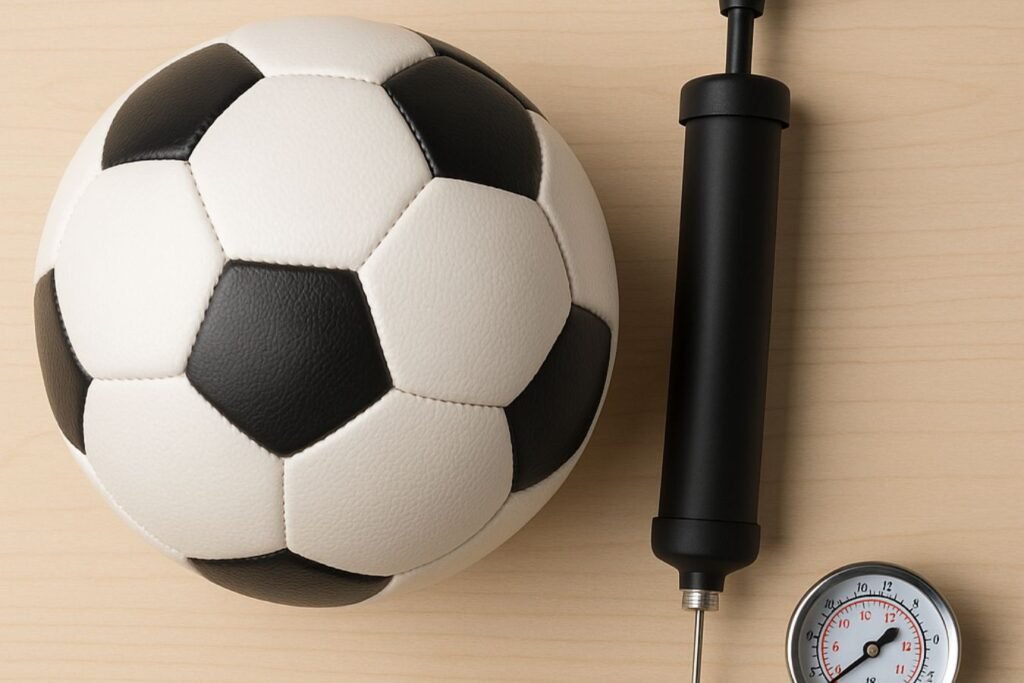
Tools & Equipment Needed
Before inflating, gather the right equipment. Essential tools include:
- Ball Pump (Hand or Electric): A quality sports pump designed for balls. Hand pumps are common and portable; electric pumps are faster (great for multiple balls). Many ball pumps have a built-in PSI gauge.
- Inflation Needle (Nozzle): The thin metal needle that screws into the pump and fits the ball’s valve stem. Some pumps include multiple needle sizes.
- Pressure Gauge: Even if your pump has one, a separate gauge can give a second check to ensure accuracy. Inaccurate gauges can lead to over/under inflation.
- Valve Lubricant: A few drops of water or valve oil on the needle helps create a good seal and protects the valve.
- Clean Cloth: Wipe the ball dry before pumping to avoid introducing dirt into the valve and to prevent slipping.
- Ball Stand or Surface: Place the ball on the ground or a stable surface; holding a ball in the air while pumping is difficult and can weaken your pumps!
Having these ready will make inflation smooth. For example, adding valve oil or water (as SoccerCommand recommends) when first inserting the needle improves sealing and keeps the valve healthy. Always insert needles carefully to avoid damaging the bladder. If using an electric pump, follow manufacturer’s instructions to avoid overpressure.
Step-by-Step Inflation Guide
- Loosen the Ball’s Bladder (First Time Only): If the ball is brand-new or has been stored deflated, gently unfold and shake it so the inner bladder moves freely. This prevents wrinkles that can trap air unevenly.
- Check Valve and Clean Ball: Wipe around the valve to remove debris (dirt or sand can damage the valve). Confirm the valve is fully closed (press in and it should seal).
- Lubricate the Needle: Wet the needle tip with a drop of water or petroleum jelly. This helps form an airtight seal and prevents tearing the valve.
- Insert the Needle: Gently push the needle straight in all the way until it stops. Don’t force at an angle – wrong insertion can puncture the bladder.
- Pump Air Slowly: Begin pumping, using smooth, steady strokes. If using a hand pump, brace it on the ground for leverage. If electric, monitor closely. Inflate in short bursts, checking firmness frequently.
- Check Pressure Often: Pause periodically to measure pressure with your gauge. Aim for the target (e.g. ~10 PSI). Do not overinflate. The ball should be firm but still yield a bit under pressure.
- Stop and Remove Needle: Once at desired pressure, hold down the valve’s lip and carefully pull the needle straight out. Listen for any odd hissing (a quick hiss is normal); ensure the valve pops shut.
- Test Bounce: Drop or bounce the ball. It should rebound to about waist height for a size 5 ball. If it’s too low, add a bit more air. If it’s bouncing too hard or feels rock-solid, bleed a little air out (carefully press the valve).
Quick Tip: Inflate to the lower end of the recommended range for better ball control (precision passing), and to the higher end for more power and bounce. For training, you might inflate slightly lower; for a fast-paced game or professional match, use the higher end .
Alternatives: When You Lack a Pump or Needle
Sometimes you may not have a proper pump or needle. While the hand pump + needle method is best, there are DIY alternatives – though use them with caution:
- Without a Pump: You can blow into the valve. Some guides suggest placing your mouth over the valve and blowing hard several times. This can work, but it’s slow and unhygienic. If you try, ensure a tight seal with your lips and blow in short bursts. (This is usually only feasible for small corrections; inflating a totally flat ball by mouth is very difficult.)
- Compressed Air Duster: A can of compressed air (used for electronics) often has a thin straw that fits into the valve. Short bursts can add some air. The can’s cold spray cools quickly, so use sparingly.
- Gas Station Tire Inflator: Many gas stations offer free tire air. If you have a makeshift connector (like a straw or a small tube) and money for quarters, you can try attaching it to the ball’s valve. Be very careful: these machines output high pressure. Inflate in quick puffs, checking often, to avoid overinflation.
- Balloon or Bag Method: Inflate a balloon and insert the deflated end of a needle or straw into the ball’s valve; then let the balloon release air into the ball. Or secure a plastic bag over the valve and squeeze it to push air in (works for small balls). Results vary.
- Without a Needle: If you have no metal needle, you can rig a substitute. For example, the hard plastic straw from a canned air duster, or the ink tube from a pen, can serve as a narrow tube. Carefully insert it into the valve as deep as needed (not too far), and use it to add or remove air. Some inflatable needle adapters (no-pinch pumps) exist commercially too.
- Siphon/Air Transfer: Some users transfer air from a fully inflated source (like another ball or a lung bag) via a thin tube. One method is to inflate a balloon fully, pinch it shut, connect it to the ball via a straw or needle, then release the pinch so the air flows into the ball. This is technically feasible but often inefficient.
Important: These no-pump methods (especially mouth inflation) are generally less reliable and not recommended for large match balls. They risk introducing moisture (which can mold the inside) or overinflating. Use them only in a pinch, and re-check the ball carefully.
Deflating a Soccer Ball Without a Needle
The question asked specifically how to deflate without a needle. To safely let air out of an overinflated ball (or to pack it away), you can:
- Pump’s Nozzle (Reverse): Some pumps have a reverse function, or simply leave the pump on the valve with the handle down – air can leak out.
- Insert a Thin Tube: As described above, insert a pen ink tube, pencil tip, or even a plastic straw into the valve and press on the ball. These items act like a tiny escape route for air. For example, sports enthusiasts suggest sliding a key or pen cap into the valve to slowly release pressure.
- Use a Key or Pin: A small metal key or sewing pin (carefully!) can be pressed into the valve to let air hiss out. Be gentle – you only need to stick it in enough to depress the valve spring.
- Pump with Needle (Loosen): If you have a needle but no dedicated deflate feature, insert it and gently push it in without pumping. This alone may let air escape gradually.
- Twist and Remove: If the ball has a removable cap over the valve (some do), unscrew it to let air out. (Not all soccer balls have this.)
These methods require patience and care. Always support the ball so it doesn’t burst out of your hands when the air escapes. The SportsHub guide notes that even common household items like a straw or pen tube can do the trick. Use slow pressure so you don’t accidentally over-release the air.
How to Check If Your Soccer Ball Is Properly Inflated
To know if your ball is at the right pressure:
- Touch Test: A properly inflated size 5 ball will feel firm under hand, yet have a slight give. It should not be rock hard. When squeezed on opposite sides, it should indent about ½ inch.
- Bounce Test: Drop the ball from chest height onto a flat surface. A size 5 ball at correct pressure bounces up to roughly waist height. If it barely bounces, it’s underinflated; if it rockets too high or feels like a brick, it’s overinflated.
- Listen: Sometimes you can hear a dull thud (underinflated) versus a sharp bounce sound (proper inflation).
- Feel/Kick Test: Dribble or kick the ball gently. It should feel responsive and roll correctly. A ball under 2/3 thickness of its original feels floppy; overinflated balls “jerk” off your foot.
- Use a Gauge: The most accurate way is with a pressure gauge. For competitive play, use a certified gauge to ensure it’s within the specified PSI range.
By combining these checks, you can be confident the ball is inflated properly. For example, GoalKick advises that the ball should “feel firm to the touch but not too hard,” and bounce “to a reasonable height”. If any doubt remains, err on the lower side of the recommended PSI – slight underinflation is safer and easier to correct than overinflation.
Common Mistakes to Avoid
- Pumping Too Fast: Rapid, forceful pumping can damage the bladder before it fully expands. Always pump gently.
- Inserting the Needle Incorrectly: Never force the needle sideways. This can puncture the ball bladder. Push straight in until it seats naturally.
- Overinflating: Exceeding the max PSI may burst the ball or alter its shape. Follow the manufacturer’s range.
- Using a Faulty Needle: Bent or dull needles can tear the valve. Inspect needles for damage before use.
- Neglecting to Moisten the Needle: Dry insertion can pinch and wear the valve. Even saliva is better than nothing if you lack oil.
- Ignoring Temperature: Filling a cold ball to normal pressure and then warming it up (or vice versa) changes its pressure by 1–2 PSI. Always store balls at room temp before final inflation.
- Skipping Maintenance: Overlooking regular pressure checks means playing with an ever-softening ball. Top up air before every match.
FAQs (Frequently Asked Questions)
Q: How much should I inflate a Size 5 soccer ball?
A: Check the ball’s label or valve area; most adult size 5 balls recommend around 0.6–0.9 bar (8.7–13.1 PSI). Many coaches use ~10–12 PSI for training. For matches, FIFA’s standard is 0.8–1.1 bar (8.5–11.6 PSI). Start at the low end and feel the ball – it should be firm but not rock-hard.
Q: What if I don’t have a pump – can I still inflate the ball?
A: Yes, but it’s tricky. You can blow air into the valve with your mouth (takes many breaths) or use alternative tools. For example, a compressed air duster straw can insert into the valve, or a tire inflator at a gas station can be used with a proper adapter. People have used balloon pumps or even hairdryers (on cool) to add air. These methods work only in a pinch; a real pump is far more reliable.
Q: Can you inflate a soccer ball without a needle?
A: Some pumps are sold as “needleless” for kids’ play balls, but standard soccer balls have a narrow valve requiring a needle. If you truly have no needle, you can improvise: insert a small stiff tube like a plastic straw or a pen’s ink tube into the valve to act as a makeshift needle. This allows you to connect an air source or blow into it. However, homemade solutions may leak, so it’s best to borrow or buy a proper needle.
Q: How can I tell if my soccer ball is properly inflated?
A: Use the thumb test and bounce test. A well-inflated ball indents about ½” under firm thumb pressure. Bounce it – it should rebound to a moderate height (about waist level). Also, the ball should feel evenly firm around its surface. If it wobbles or squashes easily, inflate more; if it nearly hurts your foot when you kick it, it’s too hard.
Q: How do I deflate a soccer ball without a needle?
A: Insert a thin object (plastic straw, small key, paperclip tube, or pen part) into the valve to let air out. You can also press down a pump nozzle against the valve to vent air. Do this slowly: press the ball gently and listen for hissing. Stop when the ball is just at the desired softness.
Q: Can I inflate a soccer ball with my mouth?
A: You can, but it’s difficult. The valve is small, so getting an airtight seal with lips is hard. It takes a lot of breath and may never reach full pressure. Plus, you introduce moisture into the ball. Some sources say it’s doable for small gains, but it’s generally not recommended. If no pump is available, try a straw or balloon method instead – they create better seals.
Q: What if my ball has a small leak?
A: If air leaks out quickly, inspect the valve for damage or debris. Try adding a drop of valve oil or soapy water to the valve. Pump a tiny bit more air, then twist the needle gently to unstick the valve. If leaks persist, the bladder may be punctured – you’ll need repair or replacement.
Q: Should I use a hand pump or an electric pump?
A: Hand pumps are inexpensive and portable, perfect for one ball or practice use. Electric pumps (or foot pumps) inflate faster, which is handy if you have many balls. Either works as long as you monitor pressure closely. Electric pumps with good gauges are ideal for teams or coaches inflating multiple balls.
Q: How often should I inflate my soccer ball?
A: Because soccer balls naturally lose air (especially new ones or high-quality balls), check before each use. If the ball feels soft or bounces low, pump it back to spec. Before official matches, confirm PSI with a gauge. Top off air every few days if the ball sits stored. Proper inflation before every game or training ensures consistent performance.
Conclusion
Inflating a Soccer Ball Size 5 properly is simple but essential. The key steps are: check and clean the valve, insert a lubricated needle straight in, pump slowly while monitoring pressure, and stop at the recommended PSI range. Remember, for a size 5 ball that’s usually around 0.6–0.9 bar (8.7–13.1 PSI), depending on playing level. After inflation, test by feel and bounce to ensure it’s firm yet responsive. If standard tools are unavailable, you can resort to alternatives (mouth, compressed air, balloon, etc.), but these carry risks and are last resorts. Regularly check pressure – even a perfect pump will slowly leak out a little. Keeping your ball at the right inflation will maximize control, safety, and enjoyment of the game. So, pump it up correctly, and get back on the pitch with confidence!